top of page

little amigurumi penguin

crochet penguin 'free pattern' amigurumi pattern free diy handmade toy little cute ravelry pinterest fat cat crochet

This is the pattern for my little amigurumi penguin. He was made with a 3.5 mm hook.

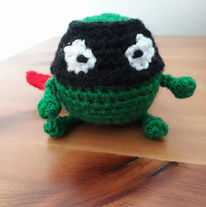
I used Stylecraft Special DK yarn. The penguin has three different colours, one for his head, body and wings, another for his beak and feet, and a third for his tummy. This chap's body and wings are Lincoln green, his beak and feet are Citron and his tummy is Cream. For the first little penguin here I used Storm Blue for his head, body and wings, Spice orange for his beak and feet, and cream again for his tummy.

The penguin also has two 6 mm safety eyes and the head and body is stuffed with toy filling. If you are making the penguin as a toy for child under three, for safety reasons you should embroider the eyes instead.

The pattern is written in US terms. The abbreviations are as follows: SC - single crochet; INC - 2 SC in the same stitch; DEC - SC decrease. I use the invisible SC decrease (insert hook into front loop only of next two stitches, draw up a loop through both stitches (two loops on hook), draw a loop through both loops on hook).


Each piece starts with a magic circle. I have a quick guide to crocheting a magic circle here.


You can use either continuous or joined rounds, depending on your preferred style. I've used a combination of the two here, joining the first round and working continuous rounds thereafter, which I think looks neater.

When making the wings, you will crochet in rounds until the last row, when you will hold the wing flat, and SC across to join the top, (inserting your hook into the two stitches opposite each other and drawing up a loop through both stitches).

I attached the eyes, beak, wings and tummy to the body before crocheting the last few rows of the body, stuffing and closing him up. If your little penguin is going to be a toy, make sure you attach all parts firmly and securely so that it will be safe for small children.

crochet penguin 'free pattern' amigurumi pattern free diy handmade toy little cute ravelry pinterest fat cat crochet

Feet

Make two.

Start with a magic circle.

Row 1:    6 SC into magic circle (6)

Row 2:   INC around (12)

Row 3:   SC around (12)

Finish off leaving a tail to attach to the body.

Tummy

Start with a magic circle.

Row 1:    6 SC into magic circle (6)

Row 2:   INC around (12)

Row 3:   SC, INC, SC, INC, SC, 2 INC, SC, INC, SC, INC, SC (18)

Row 4:   [2 SC, INC] three times, SC, INC, 2 SC, INC, 2 SC, INC, SC (24)

Row 5:   3 SC, INC, 5 SC, INC, SC, INC, SC, INC, 5 SC, INC, 4 SC (29)

Finish off leaving a long tail to attach to the body.

Head and Body

Start with a magic circle.

Row 1:    6 SC into magic circle (6)

Row 2:   INC around (12)

Row 3:   SC, INC around (18)

Rows 4-7:  SC around (4 rows of 18)

Row 8:   2 SC, INC around (24)

Row 9:   7 SC, INC around (27)

Rows 10-18:  SC around (9 rows of 27)

Row 19:   7 SC, DEC around (24)

Row 20:  6 SC, DEC around (21)

(attach eyes, beak, wings, tummy, and stuff the head and body at this point)

Row 21:   SC, DEC around (14)

Row 22:  DEC around (7)

Finish off (and attach feet)

Wings

Make two.

Start with a magic circle.

Row 1:    6 SC into magic circle (6)

Row 2:   INC around (12)

Rows 3-8:   SC around (6 rows of 12)

Row 9:   SC, DEC around (8)

Row 10: hold the wing flat and SC across the top (see notes above) (4)

Finish off leaving a tail to attach to the body.

Beak

Start with a magic circle.

Row 1:    6 SC into magic circle (6)

Row 2:   SC, INC around (9)

Finish off leaving a tail to attach to the body.

Assembly

The eyes are placed in row 5, 2 stitches apart. 

The beak is sewn beneath the eyes, into rows 6 and 7.

The arms are sewn one each side in row 8.

The tummy is placed so that the top is sewn into row 8, and the bottom into row 18.

Once the body has been stuffed and finished off, the feet are then sewn on at the bottom.

And that's it - say hello to your new little penguin friend! Happy making!

crochet penguin 'free pattern' amigurumi pattern free diy handmade toy little cute ravelry pinterest fat cat crochet


Check out my other free patterns here!

I'd love to see any little amigurumi penguins you make. Just tag me on Instagram @fat_cat_crochet, try the pin on Pinterest or create a project on Ravelry.

You are welcome to sell any little amigurumi penguins you make from this pattern but please credit me as the designer, and link back here if selling online. Please do not copy or sell the pattern itself.

bottom of page